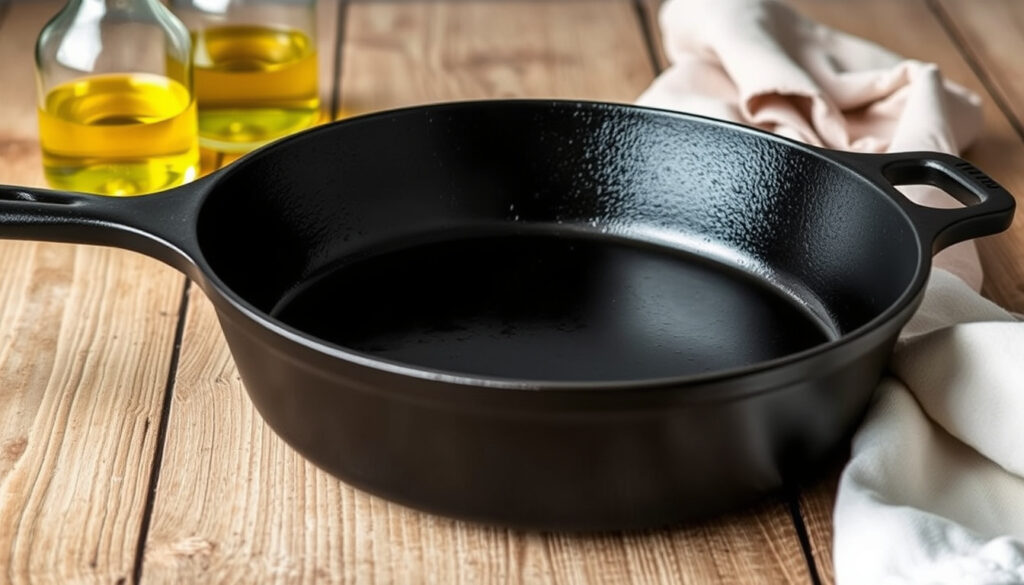
How to Season Cast Iron – Step-by-Step Instructions
Seasoning cast iron creates a protective, non-stick surface through polymerization—a chemical process where oil bonds to the pan’s surface when heated. This guide covers every essential step, from selecting the right oil to maintaining your skillet for decades of reliable use.
A properly seasoned cast iron skillet becomes increasingly non-stick over time as multiple thin layers build on each other, much like coats of paint. Whether you’re preparing a brand-new pan or restoring a neglected one, understanding the science and technique behind seasoning ensures your cookware performs at its best.
How Do You Season Cast Iron? Step-by-Step Guide
The seasoning process involves applying thin layers of oil to your cast iron and heating it to high temperatures, allowing the oil to polymerize into a durable, protective coating. Two primary methods exist: the oven method, which produces the most reliable results, and the high-heat stovetop alternative for faster completion.
450-500°F for 1 hour per coat, upside down in the oven
480°F for 50 min + 40 min sessions in a cold oven
Flaxseed and grapeseed oils with smoke points above 400°F
3-6 thin layers for a new pan, more for maximum durability
The Oven Method (Recommended)
The oven method produces consistent, durable seasoning by controlling temperature precisely throughout the process. Begin by preheating your oven to 200°F and placing your clean, dry pan inside for 10 minutes to remove residual moisture. Increase the oven temperature to 300°F, then apply approximately ⅛ teaspoon of oil to the cooking surface.
Rub the oil in concentric circles using a clean paper towel, then wipe away excess until the pan appears dry with a dull matte finish. The goal is a super-thin layer with no visible oil. Apply ¼ teaspoon total to the bottom and handle, wiping thoroughly. Place the pan in the 300°F oven for 10 minutes, then increase temperature to 400°F.
Before placing the pan in the 400°F oven, wipe away any pooled oil. Position the pan upside down to prevent oil from pooling in the cooking surface. Bake for 1 hour, then turn off the oven and allow the pan to cool inside for 30-60 minutes. Repeat this process 2-3 times minimum for initial seasoning, or up to 6 layers for maximum durability.
High-Heat Alternative Method
This faster approach completes two seasoning layers in approximately 90 minutes of oven time. Pour a small amount of flaxseed oil into the pan, wipe out all excess oil, and place the skillet in a cold oven upside down. Turn the oven to 480°F and bake for 50 minutes. Remove the pan and quickly apply another thin layer of oil before returning it to the oven for 40 minutes.
- Higher temperatures create more durable seasoning layers through better polymerization
- Initial drying phase should reach 200°F for moisture removal
- Oil curing phases typically require 300-400°F
- Maintenance seasoning uses 400°F for approximately 1 hour
- Annual maintenance seasoning helps preserve the cooking surface
- Regular cooking with fats naturally builds and maintains seasoning
- The key is consistency rather than achieving perfection immediately
| Parameter | Specification |
|---|---|
| Initial Drying Temperature | 200°F |
| Oil Application Temperature | 300°F |
| Curing Temperature | 400-500°F |
| Baking Time Per Coat | 1 hour |
| Cooling Time In Oven | 30-60 minutes |
| Minimum Initial Coats | 2-3 layers |
| Maximum Durability Coats | Up to 6 layers |
| Oil Smoke Point Required | Above 400°F |
What Is the Best Oil for Seasoning Cast Iron?
Different oils produce markedly different results based on their chemical composition, particularly their smoke points and fatty acid profiles. Flaxseed oil produces the best results for initial seasoning, creating a shiny, durable non-stick surface through optimal polymerization.
Top Oil Options
High-heat cooking oils such as avocado oil and grapeseed oil offer excellent results for both initial seasoning and maintenance applications. Canola oil produces reasonable results but remains inferior to flaxseed for creating durable finishes. Coconut oil and Crisco shortening generate lower-quality seasoning with less optimal polymerization.
Purified fats like ghee work well because they lack impurities that create uneven buildup during the seasoning process. Custom cast iron seasoning oil brands are also available for those preferring specialized products formulated specifically for this purpose.
Avoid rancid or low-quality oils entirely, as they compromise the entire seasoning process and can introduce unwanted flavors to your cookware.
Why Oil Chemistry Matters
The effectiveness of seasoning oils depends on their ability to polymerize—a process where heat causes the oil’s fatty acids to bond together and with the iron surface, creating a plastic-like coating. Oils with higher smoke points can reach the temperatures necessary for thorough polymerization without burning before the reaction completes.
How Often Should You Season Cast Iron?
The most practical long-term approach involves seasoning during regular use. Every time you cook with oil or fat, thin patches of seasoning accumulate that interlock and build upon each other, gradually strengthening the non-stick surface through repeated cooking cycles.
Continuous Maintenance Through Cooking
Apply a small amount of seasoning oil after cleaning, and the oil activates during cooking to reinforce the existing seasoning layer. Using lower heat than you would with other cookware helps preserve the seasoning, while generous amounts of fat boost non-stick properties and contribute to ongoing maintenance.
Periodic Re-seasoning Schedule
Annual maintenance seasoning is recommended as part of regular care. Coat the pan with a thin layer of high-heat cooking oil, bake at 400°F for approximately 1 hour upside down, and allow it to cool completely in the oven. Repeat this process 1-4 times to build the desired seasoning levels.
When Full Re-seasoning Is Necessary
Re-seasoning doesn’t require complete stripping if the existing seasoning remains intact. If the pan has built-up gunk but a smooth surface underneath, simply apply new seasoning on top of the cleaned old seasoning. Only completely strip and re-season if the surface is pitted or severely degraded.
How to Clean and Prep Cast Iron Before Seasoning
Proper preparation determines the quality of your seasoning. Most modern cast iron comes pre-seasoned with industrial grease that requires complete removal before applying new seasoning layers.
Initial Stripping Process
Strip the pan completely using steel wool and soap—the only circumstances where these cleaning agents should contact cast iron. Scrub thoroughly to reveal bare grey metal, dry completely with a dishcloth, then remove all residual moisture by heating the pan on a stovetop burner.
Regular Cleaning Between Uses
After each use, brush the pan with hot water using a stiff-bristled brush to remove all stuck-on food. Dry thoroughly by heating on a stovetop burner until all moisture evaporates. Avoid prolonged soaking, as extended moisture exposure promotes rust formation.
Soap and steel wool should only be used during initial stripping. For regular cleaning after seasoning is established, avoid these products to preserve the protective coating.
Common Mistakes When Seasoning Cast Iron and How to Avoid Them
Understanding common errors helps prevent wasted effort and substandard results. Several predictable mistakes consistently undermine the seasoning process.
Excess Oil Problems
Pooling or “spiderweb” marks indicate too much oil remained on the pan during seasoning. These marks create an uneven, spotted finish. The solution involves thorough wiping—you should end up with much less than 1 teaspoon of total oil on the surface after wiping.
The goal is a super-thin layer, not visible oil. More oil does not mean better seasoning—it creates sticky, uneven surfaces instead.
Why Seasoning Fails
Seasoning fails when wrong oil is used, particularly low-smoke-point oils or rancid oil that cannot properly polymerize. Insufficient frequency of seasoning maintenance, inadequate wiping of excess oil, and excessive buildup from poor long-term maintenance all contribute to substandard results.
Managing Imperfect Finishes
Visual imperfections don’t affect cooking performance—only aesthetics suffer. Poorly finished pans still cook delicious meals effectively. The seasoning process improves with practice, and minor mistakes during initial attempts rarely impact the pan’s functionality.
Seasoning Timeline: From New Pan to Lifetime Cookware
- Initial preparation: Clean and strip the pan to remove factory seasoning or protective coatings
- First seasoning session: Apply 2-3 thin coats using the oven method at 400°F
- Early use phase: Cook fatty foods regularly to build initial seasoning through cooking
- After 5-10 cooks: Assess the surface and apply maintenance coats if needed
- Regular maintenance: Annual re-seasoning and consistent cooking with fats
- Long-term maturation: Over decades, properly maintained cast iron develops increasingly durable, non-stick surfaces
Myths vs. Facts: Clarifying Cast Iron Care
| Myth | Fact |
|---|---|
| Never use soap on cast iron | Mild soap is acceptable after seasoning has fully cured |
| More oil creates better seasoning | Thin layers prevent stickiness and uneven coating |
| Perfect seasoning happens immediately | Seasoning builds gradually over months of use |
| Cast iron requires constant re-seasoning | Regular cooking with fats continuously maintains the surface |
Why Seasoning Works: The Science Behind the Process
Seasoning cast iron involves polymerization, a chemical transformation where heat causes cooking oils to bond with the iron surface and with each other, creating a hard, plastic-like coating. This polymer layer fills the pores of the cast iron and creates a smooth, non-stick surface resistant to moisture and food adhesion.
The chemistry behind seasoning explains why temperature and oil selection matter so much. Achieving proper polymerization requires reaching specific temperatures—typically between 400-500°F—where the oil’s fatty acids can crosslink into durable chains. Different oils polymerize at different rates and temperatures, which is why flaxseed oil with its high linolenic acid content produces superior results for seasoning applications.
Sources and Expert Guidance
Seasoning is cooking oil into a plastic-like coating that covers the surface of cast iron.
— Serious Eats, comprehensive cast iron care guide
Expert guidance on cast iron seasoning comes from multiple sources, including manufacturer documentation from established brands, culinary publications with food science expertise, and cooking school curricula that have refined these techniques over generations.
- Field Company cast iron care documentation
- Traditional Cooking School food preparation guides
- Professional chef seasoning techniques and recommendations
- Cast iron manufacturer care manuals
Summary and Next Steps
Seasoning cast iron requires patience and consistency rather than technical complexity. Apply thin layers of high-smoke-point oil, cure at appropriate temperatures, and build durability gradually through regular cooking use. Annual maintenance and proper cleaning preserve your seasoning for decades of reliable service.
For those looking to test their newly seasoned skillet, try preparing Air Fryer Brussel Sprouts – Crispy in 15-20 Minutes as a first cooking project, or explore the Mango Ice Cream Viral – Thai Sensation’s Origin, Recipe and Availability for a sweet treat that benefits from cast iron’s excellent heat retention.
Frequently Asked Questions
Can you ruin cast iron by over-seasoning?
Over-seasoning typically results in sticky, uneven layers rather than permanent damage. Strip and restart the process if buildup becomes problematic.
Does cast iron seasoning wear off?
Seasoning gradually thins with use and cleaning, which is why regular cooking with fats and periodic maintenance re-seasoning keeps the surface optimal.
What if my seasoning appears patchy or uneven?
Uneven appearance doesn’t affect cooking performance. Apply additional thin coats to improve aesthetics if desired.
Can you season cast iron on the stovetop?
Stovetop seasoning is possible using high heat, though oven methods generally produce more consistent results through better temperature control.
How long does it take to season cast iron completely?
Initial seasoning requires approximately 3-4 hours of oven time across multiple sessions. Building durable, mature seasoning through regular cooking takes months of consistent use.
Is vegetable oil good for cast iron seasoning?
Vegetable oils work but typically produce lower-quality results than flaxseed or grapeseed oils due to their varying smoke points and fatty acid compositions.
How do I know if my cast iron needs reseasoning?
Food sticking consistently, visible rust spots, or a dull grey appearance indicate the seasoning has degraded and requires maintenance or full reseasoning.
More related posts
 How Bad Is Your Spotify? AI Roast Tool & Listener Stats
 Car Rental Las Vegas – Prices, Companies and Airport Guide
 Emilie Kiser Trigg Drowning: Tragedy, Forgiveness, Legal Outcome
 How Old Is the Sun? Age, Lifespan, and Comparison to Earth
 Mets vs Detroit Tigers Match Player Stats 2026 | Game Recap
 What Does Skibidi Mean – Origin Story and Gen Alpha Slang Guide
 The Eminence in Shadow: Where to Watch Hulu HiDive
 Joseph Quinn Movies and TV Shows: Complete Filmography